

How to Make a Homemade Artisan Bread Recipe | Seriously the Best Bread Recipe Ever!
Hey! Chef Billy Parise here.
Thank you so much for stopping by my YouTube channel. I really appreciate it. But today, you've came to the right place, 'cause I'm gonna show you how to make an absolutely delicious, simple country loaf bread recipe. So be sure to hold on.
When it comes to baking, you have to know that it's an absolute science. And maybe you've even heard that before from others. I remember it hearing for the first time in culinary school.
And the reason that is, is because exact measurements are needed, or else things just don't turn out. So the first thing we're gonna do is measure up some bread flour, or some 00 flour.

It's actually the same flour that you would use in making pasta, and it's loaded with protein, which makes it nice and stretchy, or really, the gluten is what's helping do that, and lots of yummy air pockets, which bread should be loaded with.
So what we're gonna do is simply transfer that to a bowl after we've measured it. And for a little bit of flavor, a little bit of complexity, and, of course, a gorgeous, outer brown crust shell on our bread.

We're gonna measure out a little bit of whole wheat flour, and this is exactly the same process that we're doing with the bread flour. Measure it out to a exact gram amount. And be sure to use a gram scale, because that's the only way you can get exact measurements.
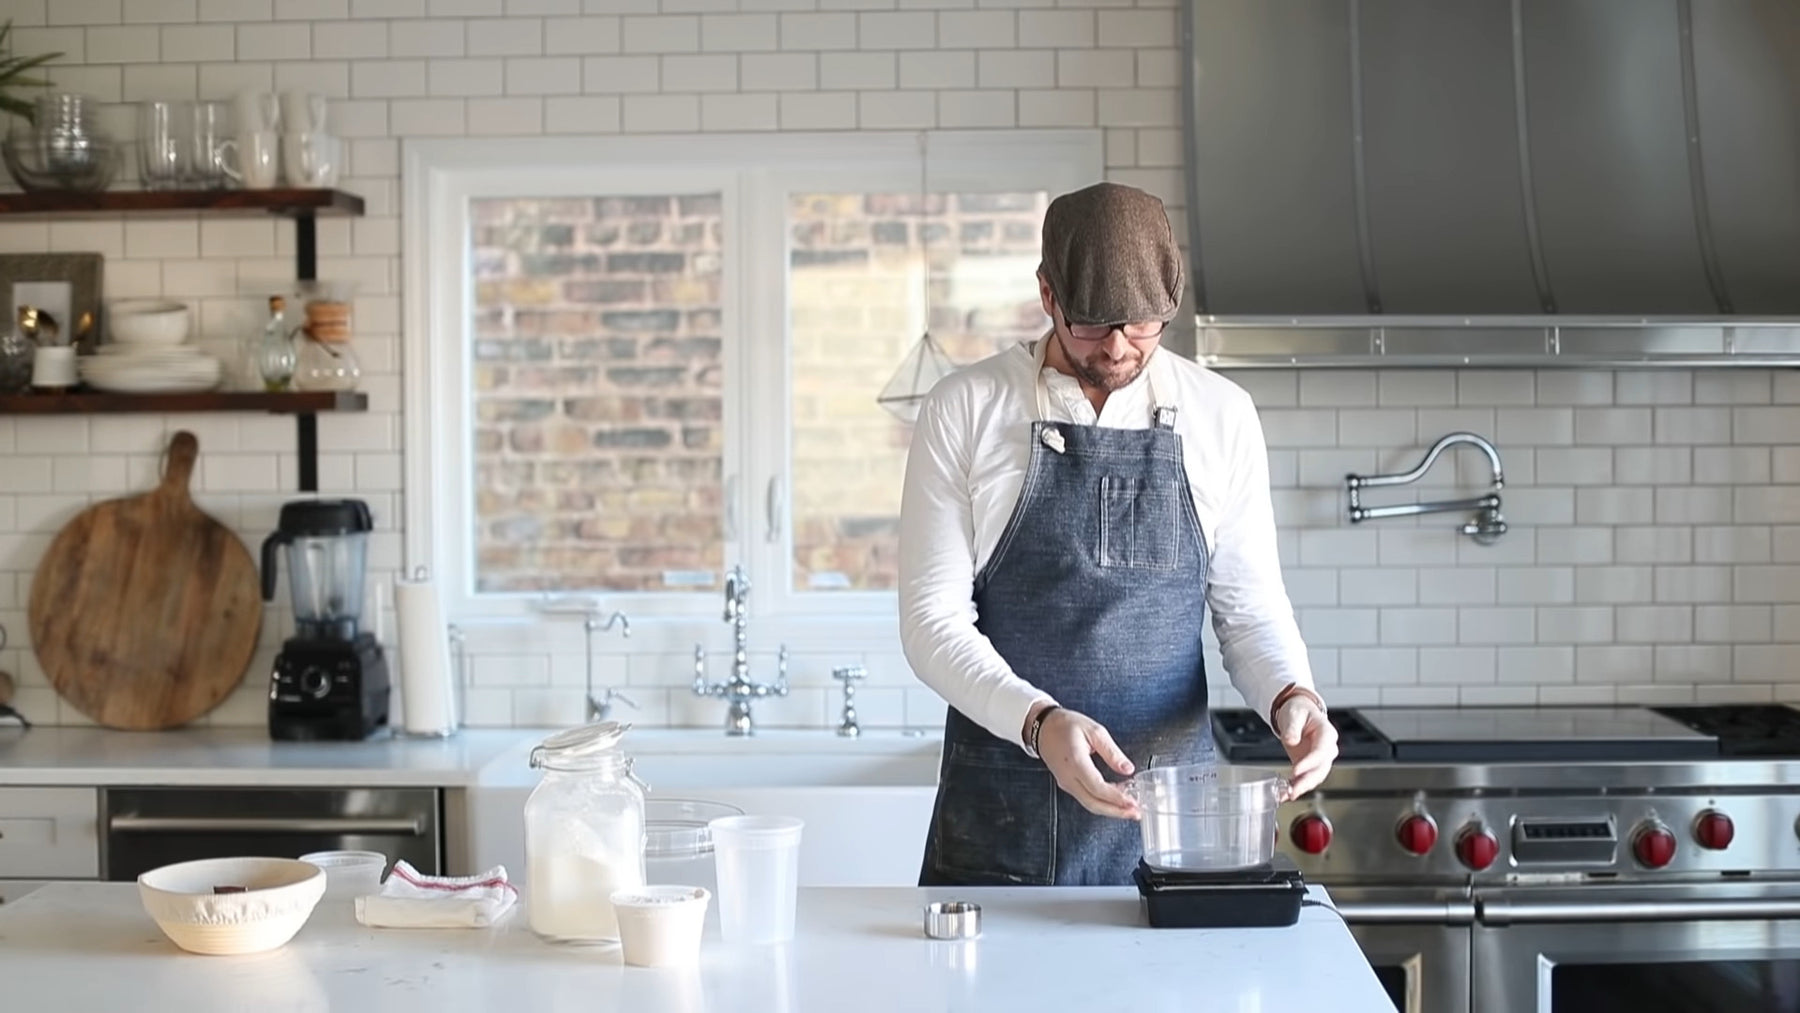
Don't use ounces. Don't use measuring cups or spoons. Use a gram scale. Pour it into that bowl. And then we're gonna head over to be sink, and we're going to temperature gauge out some water. 98 to 100 should do it.

We're not looking for a quick activation, but more of a long activation. So over a few hours at lower temperatures, you know much lower than the 110 to 115 that maybe you're used to is going to help activate the yeast over time.
So just like the flours, we're going to completely measure out the weight of our 98 to 100-degree temp water till we get to that perfect amount. Check out measuring tools here for your next kitchen session.

And really, we just wanna pour right into that bowl with the other flours in it. And no need for a wooden spoon or a spatula. It's time to get a little dirty, so roll up your sleeves and get your hands right in there and mix everything.
And the reason we do that is so you can feel the dough completely. You can sort of squeeze in together or fold it. You just wanna make sure there's no dry flour in the bowl, and your hands are the only way you're going to be able to feel it, obviously.

You can see it when you mix with a spoon, but you can actually feel it and make sure it's incorporated when you do it by hand.
You're gonna have the stickiest hands on Earth, so be sure to figure out how to scrape with the other hand. And next, you want to set it, the bowl, on a towel. That's just 'cause the granite is really cold and you don't wanna get it too over temperature.

And it's gonna sit for about 10 minutes, before we add in our salt, and sprinkle it over top. And in addition, we're gonna sprinkle over our yeast. And you want to fold that over and incorporate all the yeast and salt as best you can.
This is absolutely going to takes a couple minutes. It's obviously like a kneading process, but you're using your hands. And it's just so incredibly important to get that yeast and that salt running through that flour-water mixture.

Dip your hands in a little bit of water. so the dough doesn't stick to you. And really just keep folding and squeezing. And you could do this sort of pinching or pinching sort of technique that you see me doing here.
Just to help squeeze everything together and really ingrain that yeast and that salt into the flour. Like I said, you're looking at about four or five minutes of doing this until it's completely finished.

And once you feel like it's incorporated, we're gonna throw a towel over it. And we're gonna first let it sit for about 15 to 20 minutes before we come back and we give it a couple of little folds using our hands.
And really, this is just to kind of help move the dough around a little bit. And you'll see me stretching out the dough. I mean look at how great this is. Not to the point where it's breaking, but just stretching it, activating that gluten in there.

You see that yeast starting to work. And you're maybe looking at about a two-minute process. Just sort of keep it at the bottom of the bowl. And we're gonna go ahead and throw another towel on here, and let it sit for another 45 minutes to 1 hour.
We're not necessarily looking for it to rise super high, but more just to help activate everything. So just like in the same process before, you wanna stretch out the dough, and fold it over a few times.
Do not spend more than two minutes on this process. You also don't wanna overwork anything. But stretch it out, fold it over, and when you feel pretty good about it, we're gonna throw a towel over it.

And next, we're gonna let it sit for probably an hour and a half to two hours, or until it's almost tripled in size.
We're gonna set it to the side. We're gonna sprinkle the flour on a clean surface. And we're simply gonna take the dough out of the bowl.
You'll notice it will be little sticky, but incredibly fluffy and light. You've never felt bread like this unless you've done this regularly. We're gonna sprinkle on a little bit of flour. And then we wanna fold it over a few times, almost lie in thirds as you see me doing here.
I know I'm not doing the best, but the flour is kinda preventing me doing that. But just fold it over until you get a nice round. You don't want to over-knead this at this stage at all.

And sort of just cupping your hands around it, and bringing them together underneath. You wanna form a round. And you will love this part. It's almost therapeutic. Obviously, I just keep doing it.
It feels so good on my hands. The bread feels amazing. And what we're gonna do is set it to the side a little bit. And then we've got a banetton, which is going to help proof our bread. I've got a circle one. They make oval shapes. And we're gonna sprinkle it, like I said, with a little bit of flour, and we're going to place our dough right in there.
And we're gonna toss a towel over it, and we're gonna let it proof for about 45 minutes to a hour. We're not looking for a crazy raise here, but just to get it up a little bit. Next we're gonna add a Dutch oven pot to n incredibly hot stove at 475 degrees.

You wanna do this about 30 minutes before it is time to start cooking the bread. Once the proofing process is over, your oven is nice and hot, what we gonna do next is simply remove the towel from the bread, and we're gonna tip it over right into the pot.
Just be careful. You don't want it to hang off the sides or anything. And just sort of maybe just smooth it out with your hand a little bit. Make sure it's in there nice. Place the top right over the pot, and bake it in the oven at that 475 degrees. You already got a nice, hot pot, so that crust has begin to form right off the bat, for about 30 minutes.

And then you literally just take it out and set it on a rack, or you can leave it in the pot if you wanna brown it a little bit further, and get that crust a little bit browner.
I prefer todo it on a rack for about 30 minutes. And then we're gonna slice it up and try it out. Okay guys, we just finished our country round loaf. It looks amazing. It smells amazing. I obviously couldn't help myself. I got in there a little bit earlier.
You can see the steam rising. And I mean, look at the light temperature. This is an all-day affair. We started at 9:30. It's 4:10. You've gotta get yourself time. Even in the past when I've made read, I rush it.
I let it sit for like an hour, let the yeast get in there. It's not enough time, you guys. It took probably 3 hours and 45 minutes. Three hours to rise, 45 minutes to proof. Absolutely use that Dutch oven. It will help brown up your bread. It will keep it nice and moist.

You can see the beautiful air pockets just, honestly, already in there. All of this, all of this bread, honestly looks absolutely phenomenal. Let's just give it a quick, little taste.
Yeah it's good, and you'll love it. Be sure to sub my channel. Obviously, have a ton of great videos here. A lot of top-down, a lot of two-camera. Thanks for your follow. I got a lot of bread to eat.
We'll catch up with you later.
You can also watch this video on Youtube and subscribe to their channel.
Leave a comment